Which Amalgam Separator is the Right One for Your Dental Practice?
Practice Tips #24 explores how to find the right amalgam separators for your dental practice. While amalgam is a cost-effective restorative material, when introduced into the waste stream, amalgam breaks down into its constituent components. Most often through the incineration during the waste treatment process. This gets released into the environment. The mercury consists of roughly 50% of amalgam. Regardless of one's feelings on this charged issue, further legislation was necessary.
Many areas require installation of amalgam separators on dental office waste lines. The American Dental Association lists an ISO11143 certified amalgam separator as part of their BMP’s (see ADA website here).
What is ISO 11143?
ISO stands for the International Organization for Standardization. 11143 represents the number assigned to the standard developed by representatives of member countries (including the United States). They determine the requirements for dental amalgam separators and the means to verify (test) the efficiency thereof.
A committee of numerous industry experts including manufacturers and dentists spent several years to create the most recent revision of the standard. ISO 11143 requires amalgam separators to remove at least 95% of all amalgam from the waste stream. Many local regulations exceed this requirement asking for 99% removal.
When looking for an amalgam separator, the first thing to verify is ISO 11143 certification and at what efficiency. As it is specified in many regional regulations, most separators on the market are certified at or above 99% efficiency (such as all models we carry). To be certain, verify your local requirements and get certification from the dealer for whatever separator you purchase. They should verify it meets or exceeds your local requirements.
Regulations vary according to local guidelines. Many areas have lists of approved separators. While inclusion of a separator on this list is helpful, exclusion is not necessarily conclusive.
Using a Cuspidor?
Additionally, check your local regulations for any special stipulations covering installation. Do you have a cuspidor? Most areas where cuspidors are frequently used have them specified in the regulations and require the cuspidor also drain into a separator. This would normally require either purchasing a separator that can operate under a gravity feed (such as the AD-1500) or using a vacuum drain kit to connect your cuspidor to the central vacuum.
How Big of a System Do You Need?
Consider the needed capacity.Make certain that the system you get has the capacity you need. Most systems are rated for a certain number of operatories and have a longevity based on the total number of users.
- How many operators will the unit serve?
- Are you a solo practitioner?
- Do you have an associate or a group practice?
- How many operatories?
Where Are Your Amalgam Separators Installed?
Most amalgam separation systems install in one of two locations, either chairside or at the central vacuum.
- Chairside Systems: Generally smaller and only serve one chair (as the name implies). Often the cost of two or even three chairside systems can be less than one central system.
- In-Line Systems: Install at the central vacuum and serve the entire office. Make sure your central system supports as many operatories as your practice.
Most separators try to be as compact as possible, but check the dimensions and compare that to where it installs. Make sure you have enough room to install it.
What About Cost?
Once you’ve determined what amalgam separation system(s) meet your local regulations and have the capacity you require, start to compare costs. When looking at cost, the initial purchase price is only one part of the equation. Compare recurring costs, replacement separator cartridges, disposal, and any other maintenance costs. The ADA recommends amortizing costs on an annual basis to determine ongoing maintenance costs.
Breaking Down Costs:
- Cartridge Lasts 6 Months: System sells for $700 and has a replacement cartridge that sells for $500. For the first year, you’ve got a projected cost of $1700. For the year after it costs $1000/year.
- Cartridge Lasts 18 Months: System sells for $800 with a cartridge that sells for $600. For the first year, you’ve got a cost of $1400. But for the years after it costs $400/year.
Additionally, some systems include disposal of filled cartridges in the replacement cartridge cost. Be sure to take this into consideration as well.
If you have a waste hauler that disposes of amalgam scrap (chairside traps etc.) who can easily add any filled separator cartridges to the pick-up, it may be better to use a system that doesn’t have extra charges added in for disposal. However, if separate disposal is something that you can’t easily arrange or it will be more expensive, having disposal taken care of with the replacement cartridge may be more cost effective for you.
Separator Installation
In addition to the purchase price, also factor in installation costs. For units installed at the central vacuum, you need to hire a plumber or dental technician to perform the installation for you. An interruption of the (typically) PVC vacuum lines need to be made, additional lines may need to be routed. The separator might need to tie into your existing ventilation. Some central systems also use electricity, so additional accommodation may need to be made to provide power to the system. This also requires the services of an electrician. Naturally, central systems serve the entire office.
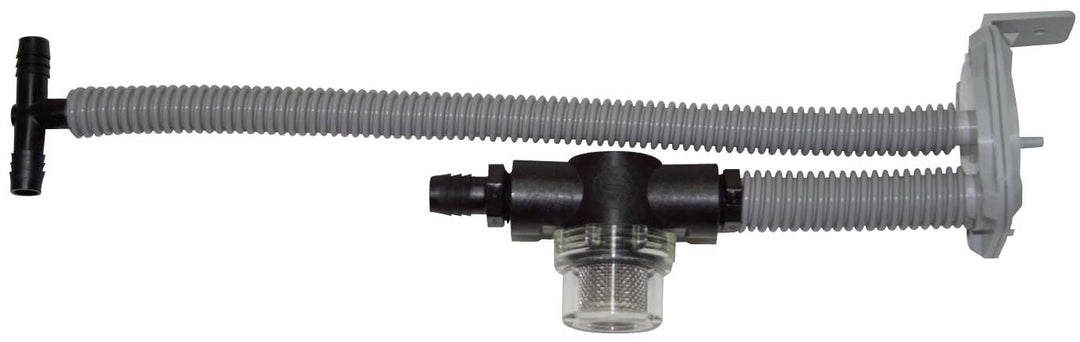
If using chairside systems, you need to install one in each room. This adds to the costs and is possibly less economical than a central system. Typically, the break-even point is 3 rooms. Chairside units (such as the Asdex AS-9 or the Simple One) are much simpler to install as they install on the flexible vacuum drain hose from the chairside trap. These systems are installed in just a few minutes by untrained staff - using little more than scissors and a screwdriver.
AS-9 Installation Instructions
As we described in Practice Tips, amalgam separators are a key component to keeping your dental office compliant. More regulations come into existence and become more important to increase your knowledge of the available options.
LEAVE A REPLY